Do you want your Obsidian to look this good, with a custom transparent background? In this tutorial I’ll walk you through how to achieve it step by step using the AnuPpuccin theme along with the Style Settings plugin. The steps are simple and explained in full detail so that anyone can follow them without getting lost.
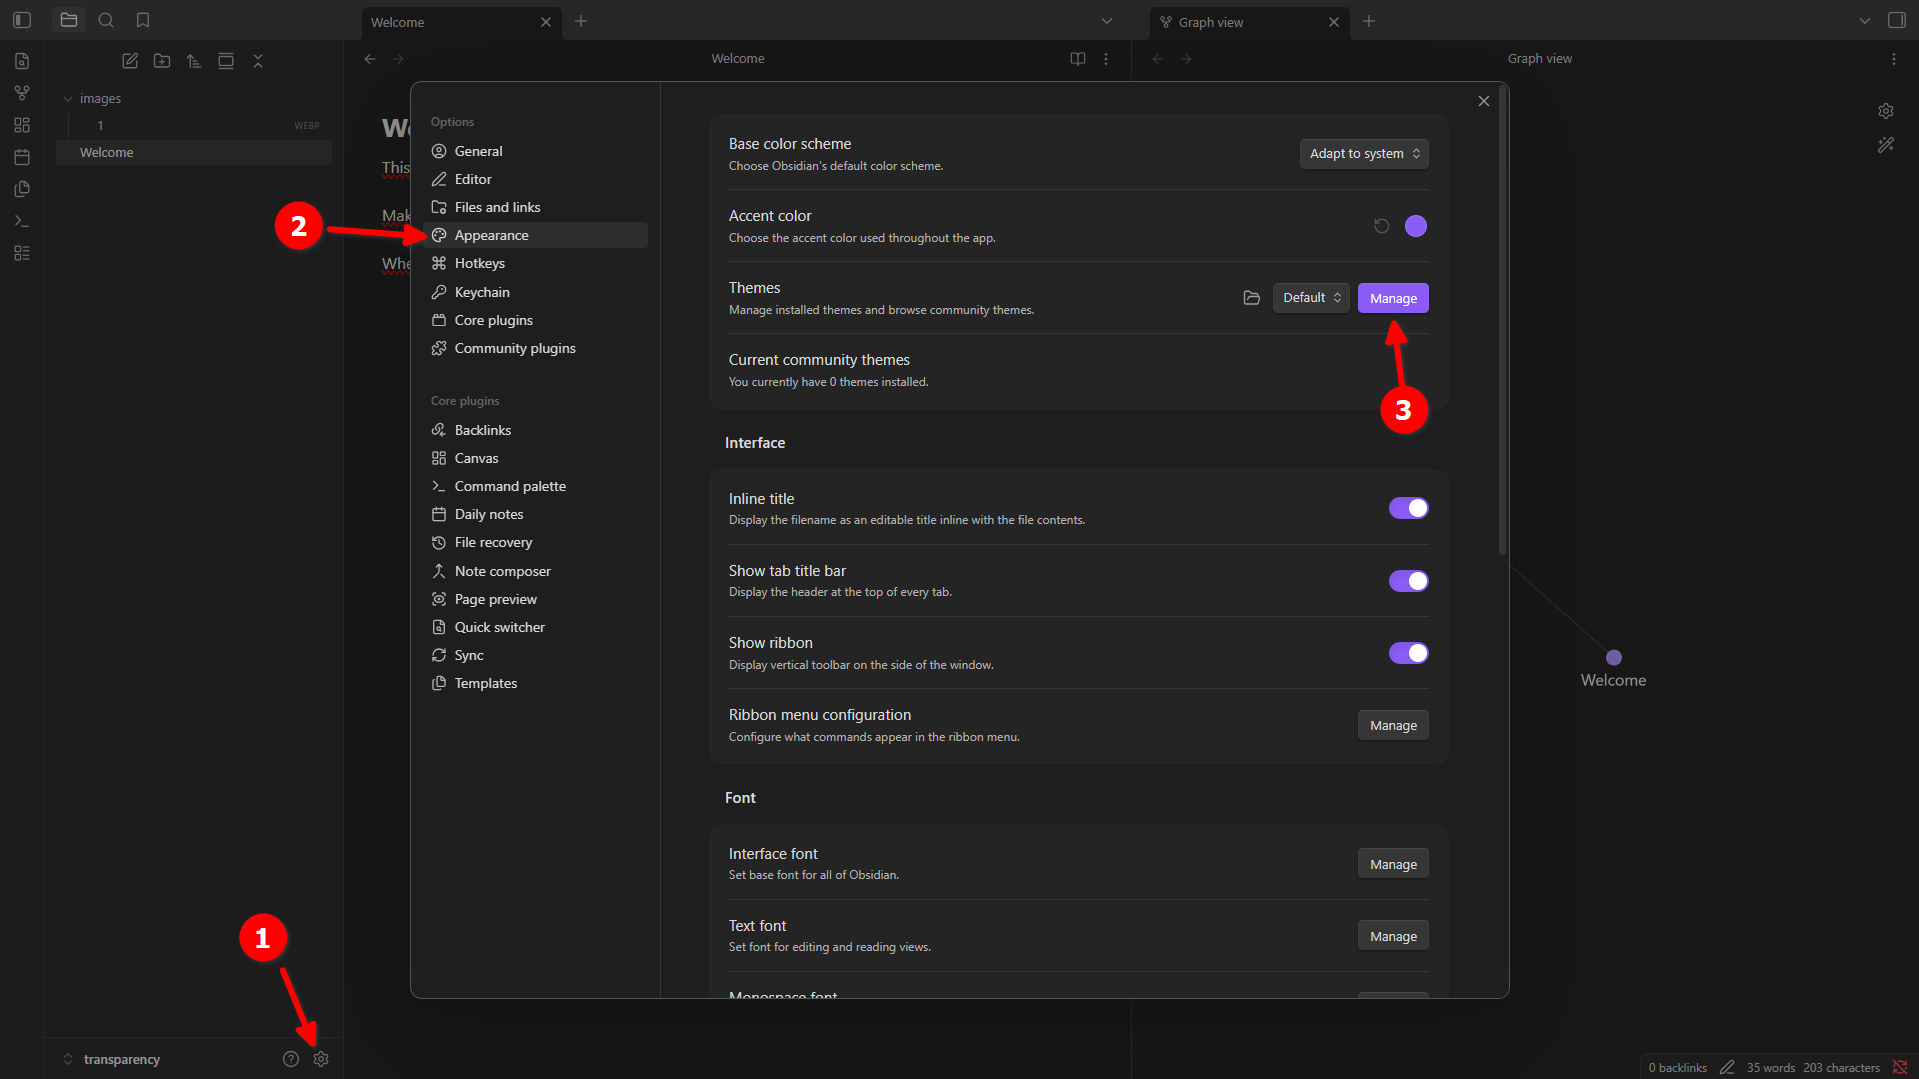
Step 1 — Open the theme manager
The first thing we need to do is install the AnuPpuccin theme, which is the one that will allow all this customization. To do so, open Obsidian and go to Settings (the gear icon in the bottom left corner). Once inside, click on Appearance in the left menu. There you’ll see a section called Themes, and right next to the active theme name you’ll find a button that says Manage. Click on it.
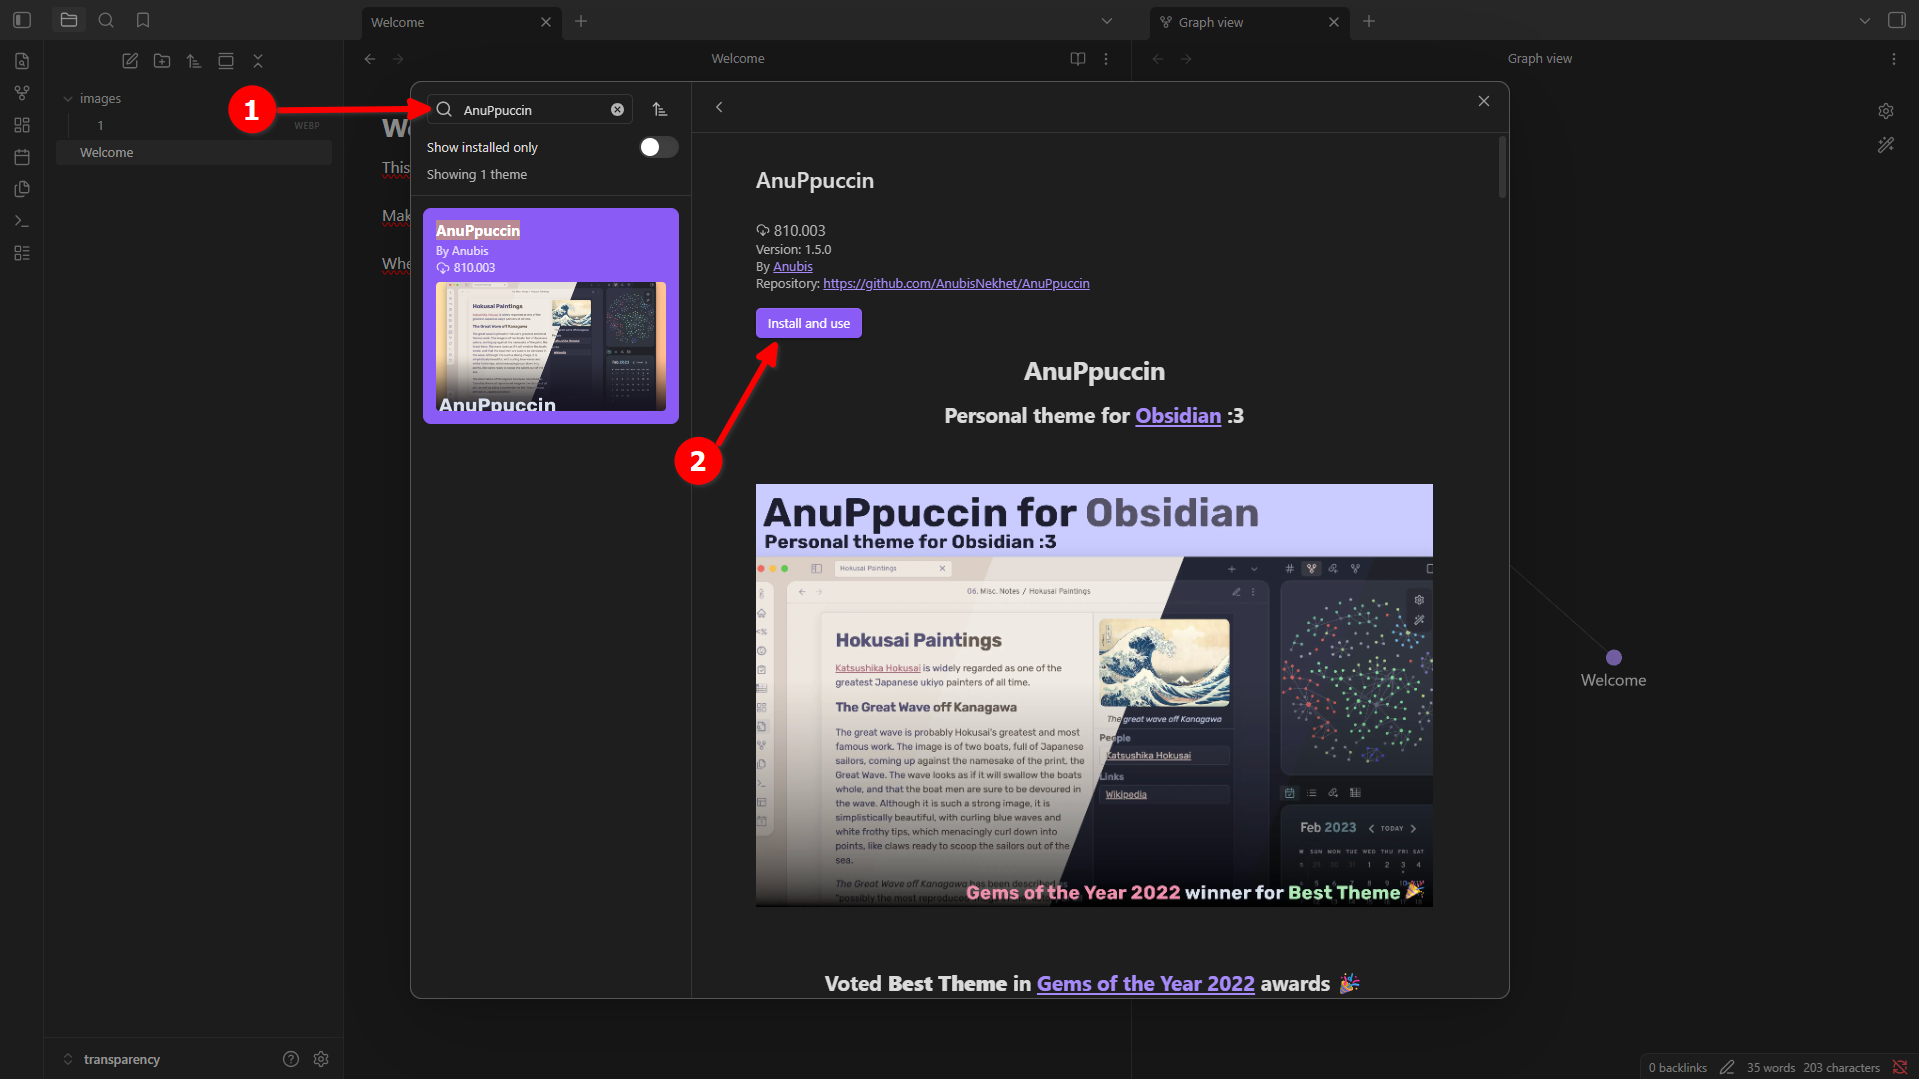
Step 2 — Search for and install AnuPpuccin
A window will open with the catalogue of available themes. In the search bar at the top, type AnuPpuccin. The theme will appear in the results. Click on it and then press the Install and use button. Wait for it to install and it will be set as the main active theme in Obsidian.
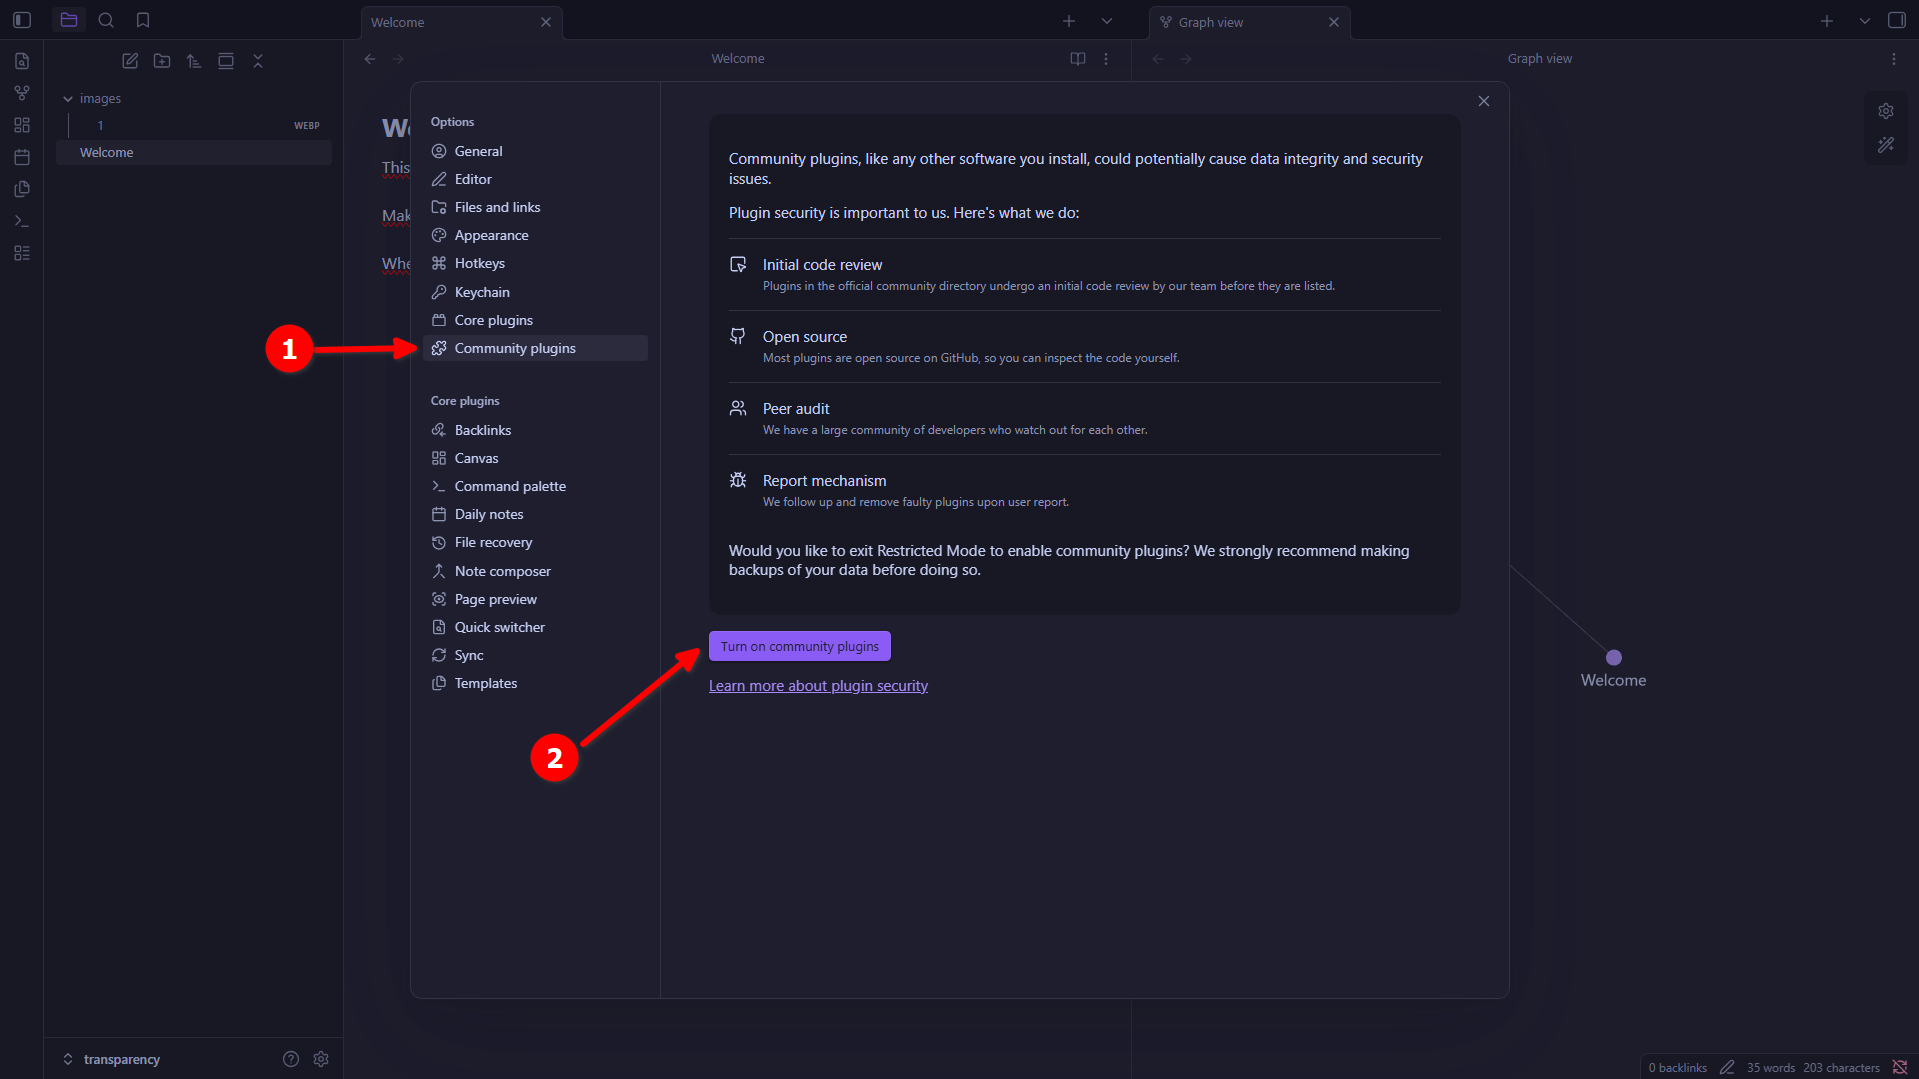
Step 3 — Enable community plugins
Now we need to enable Community Plugins, as Obsidian has them disabled by default for security reasons. Close the theme manager and, within the settings, click on Community plugins in the left sidebar. You’ll see a notice indicating that they are disabled. Click the Turn on community plugins button to enable them. This is necessary in order to install the plugin we’ll use in the next step.
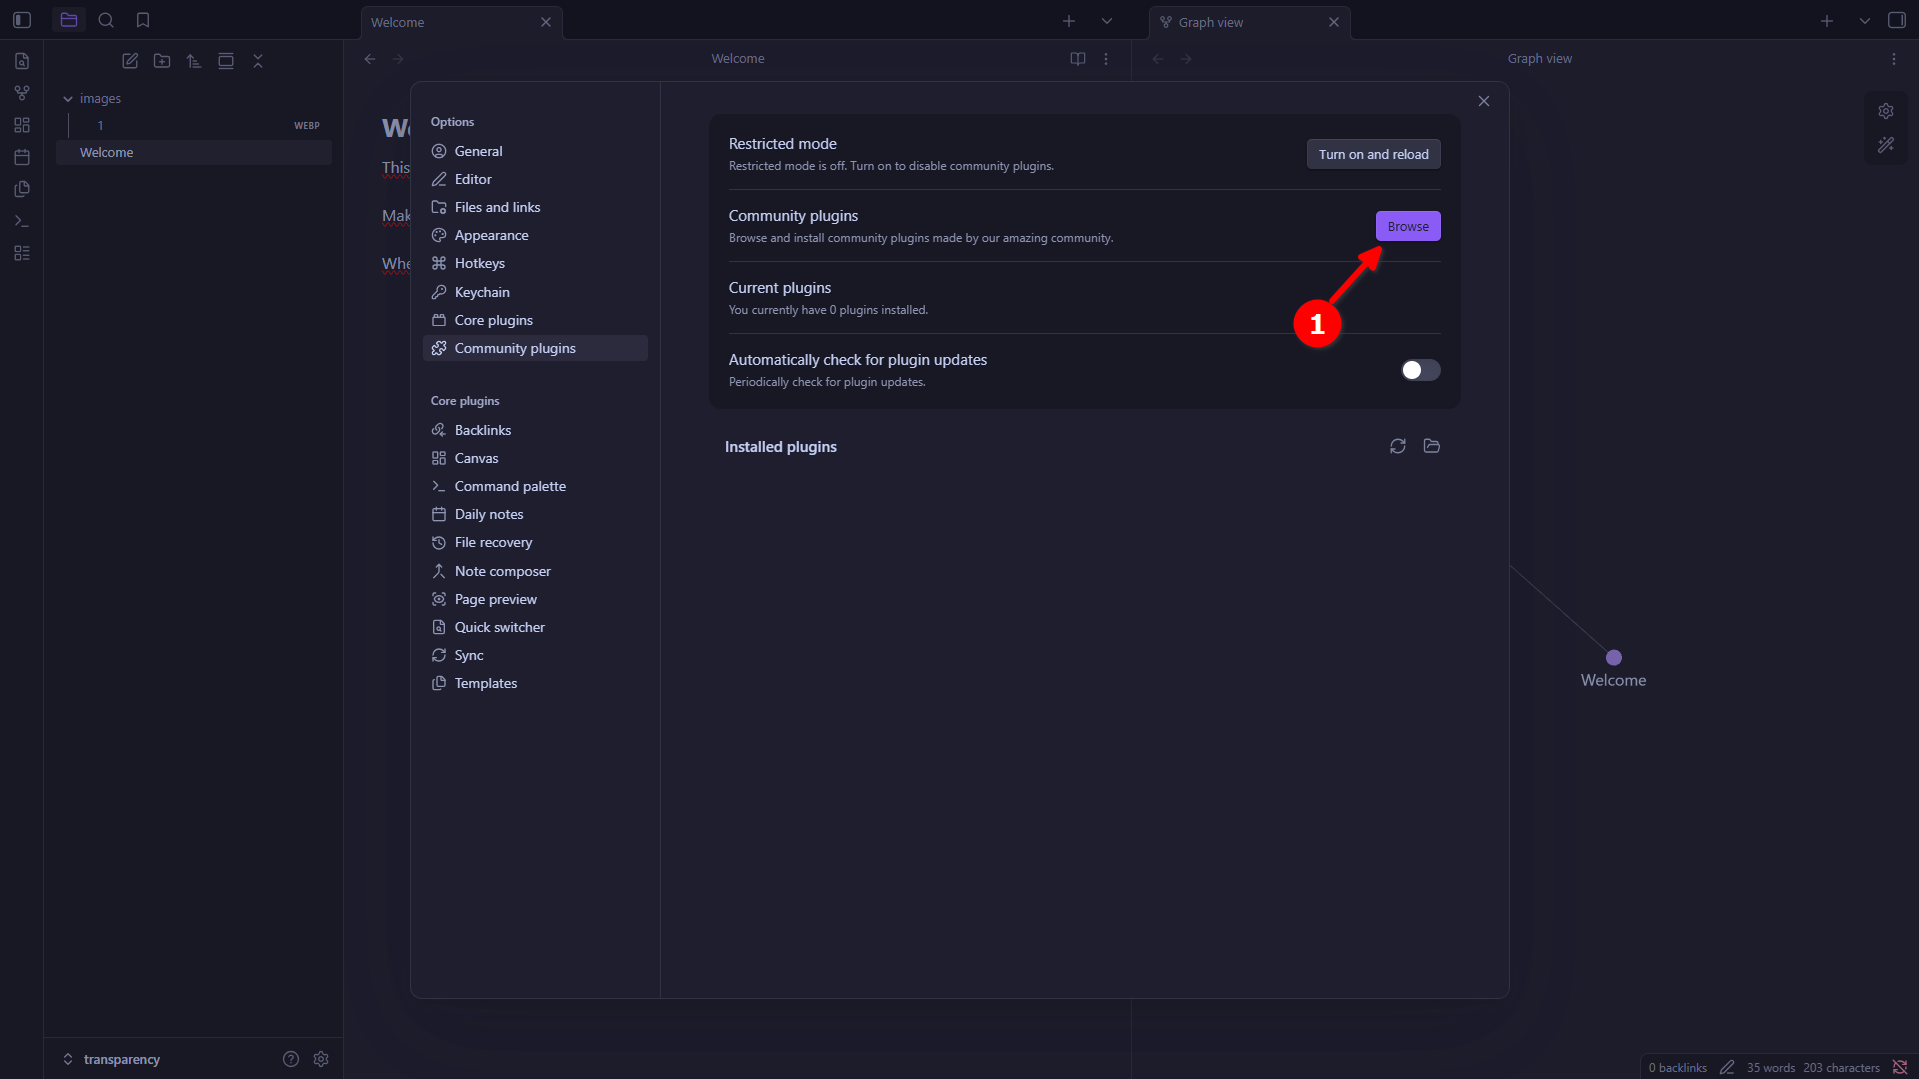
Step 4 — Open the plugin browser
Once community plugins are enabled, the section with all the available options will appear. You’ll see a button that says Browse, as shown in the image. Click on it to open the catalogue of available plugins.
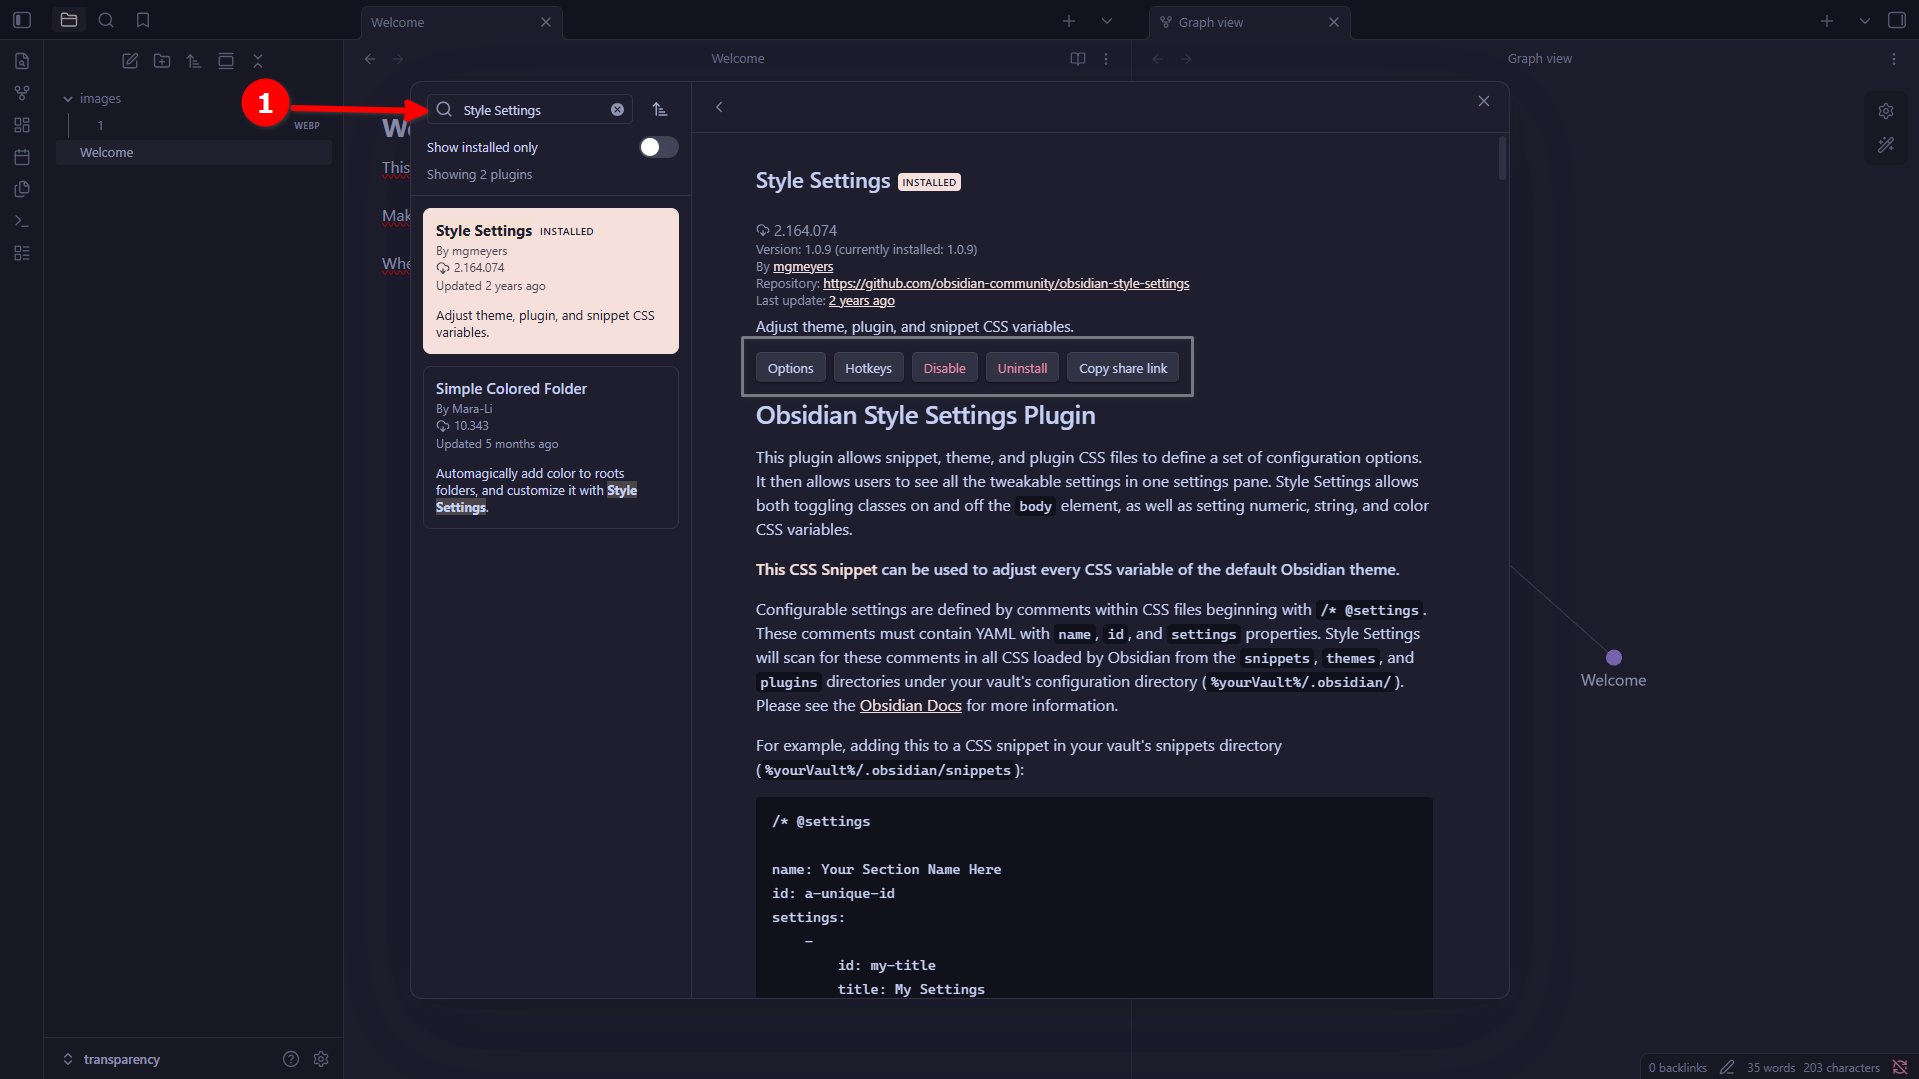
Step 5 — Search for and install Style Settings
In the plugin catalogue search bar, type Style Settings. The plugin will appear in the results. Click on it, then click Install and — very importantly — once installed, make sure to also click Enable. If you don’t enable it, the plugin won’t work even though it’s installed. This plugin is what will allow us to customize the background from within the Obsidian interface.
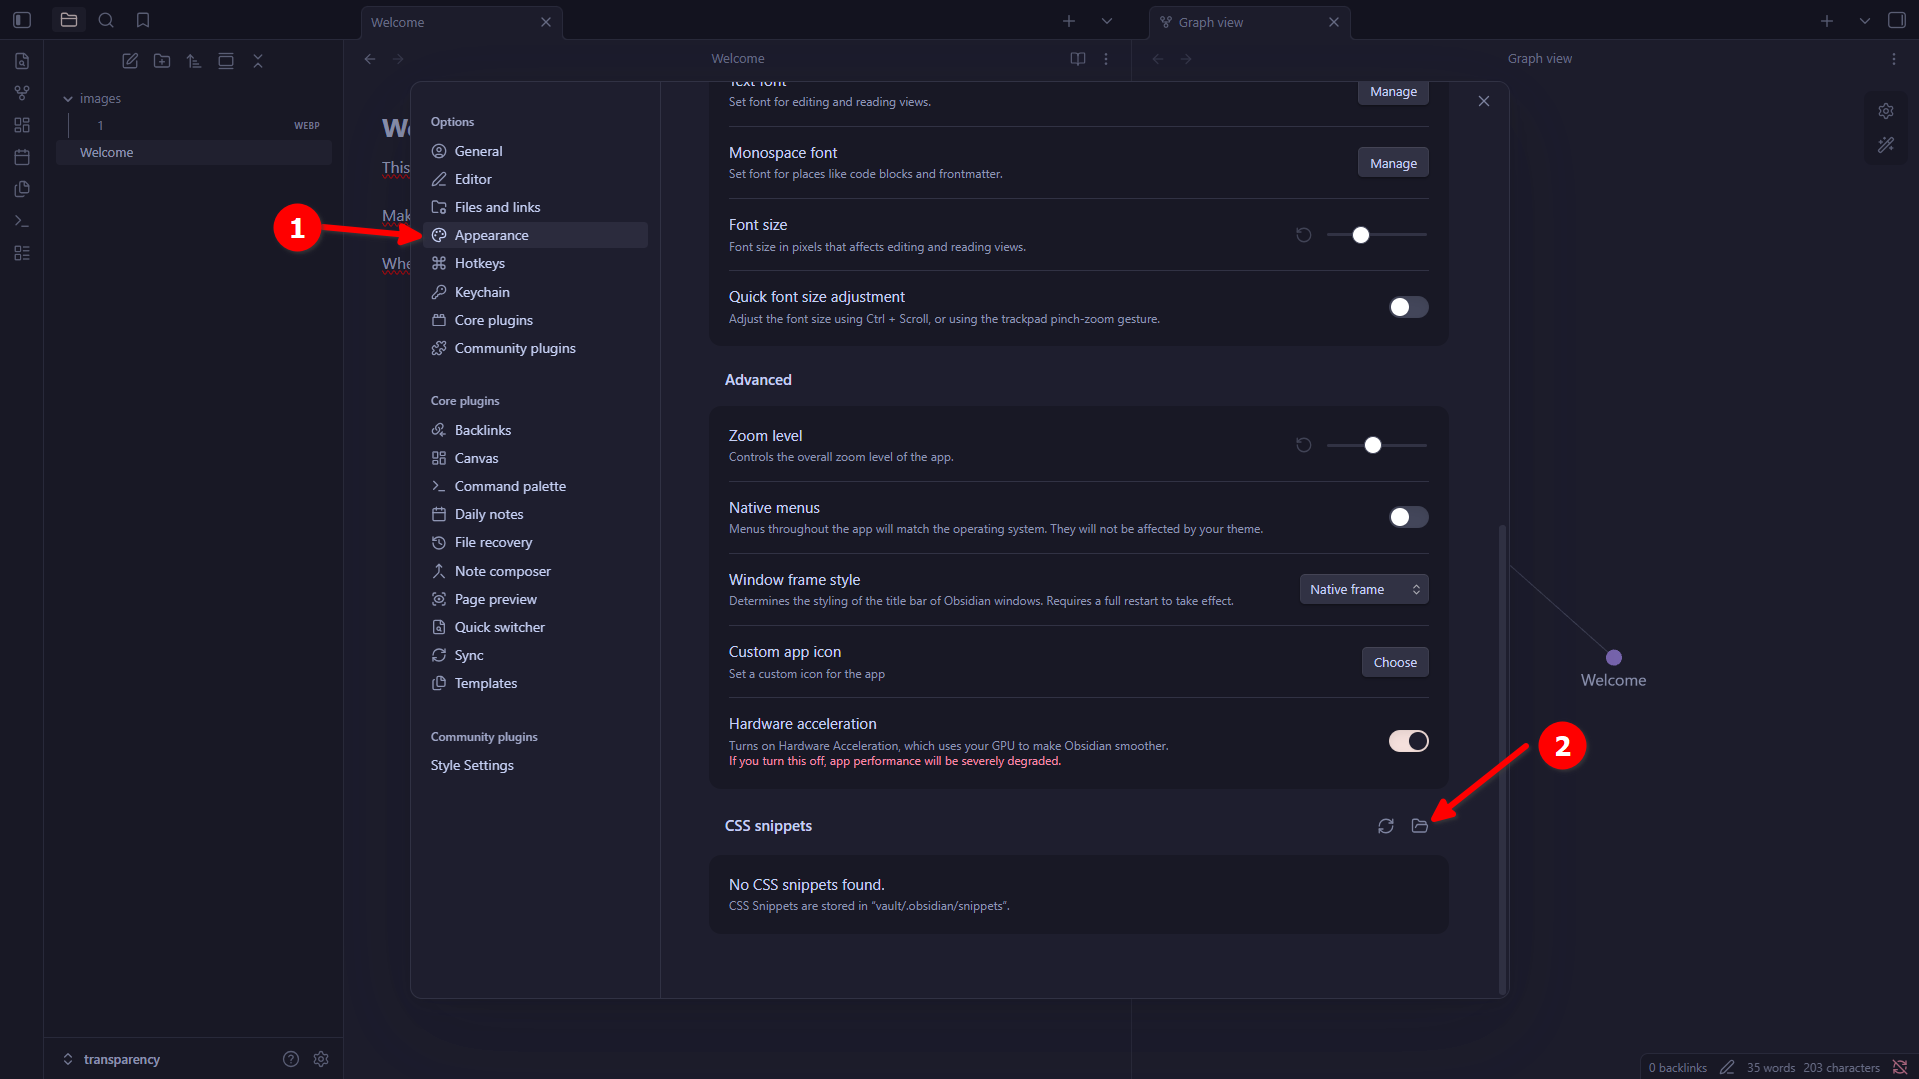
Step 6 — Open the CSS snippets folder
Now we’re going to prepare the CSS file that the theme needs to activate the background. Go back to Settings → Appearance and scroll to the bottom of the page. You’ll find a section called CSS snippets. Right next to it you’ll see a small folder icon. Click on it to open the folder in your file explorer. This is the folder where Obsidian loads custom CSS code snippets from.
Step 7 — Create a new CSS file
Your system’s file explorer will open, inside Obsidian’s snippets folder. In that folder, create a new text file and make sure its extension is .css (this is very important — if you use a different extension it won’t work). You can name it whatever you like. I called mine transpcity.css, but you can name yours anything you prefer, such as my-background.css or custom.css.

Step 8 — Copy the required CSS code
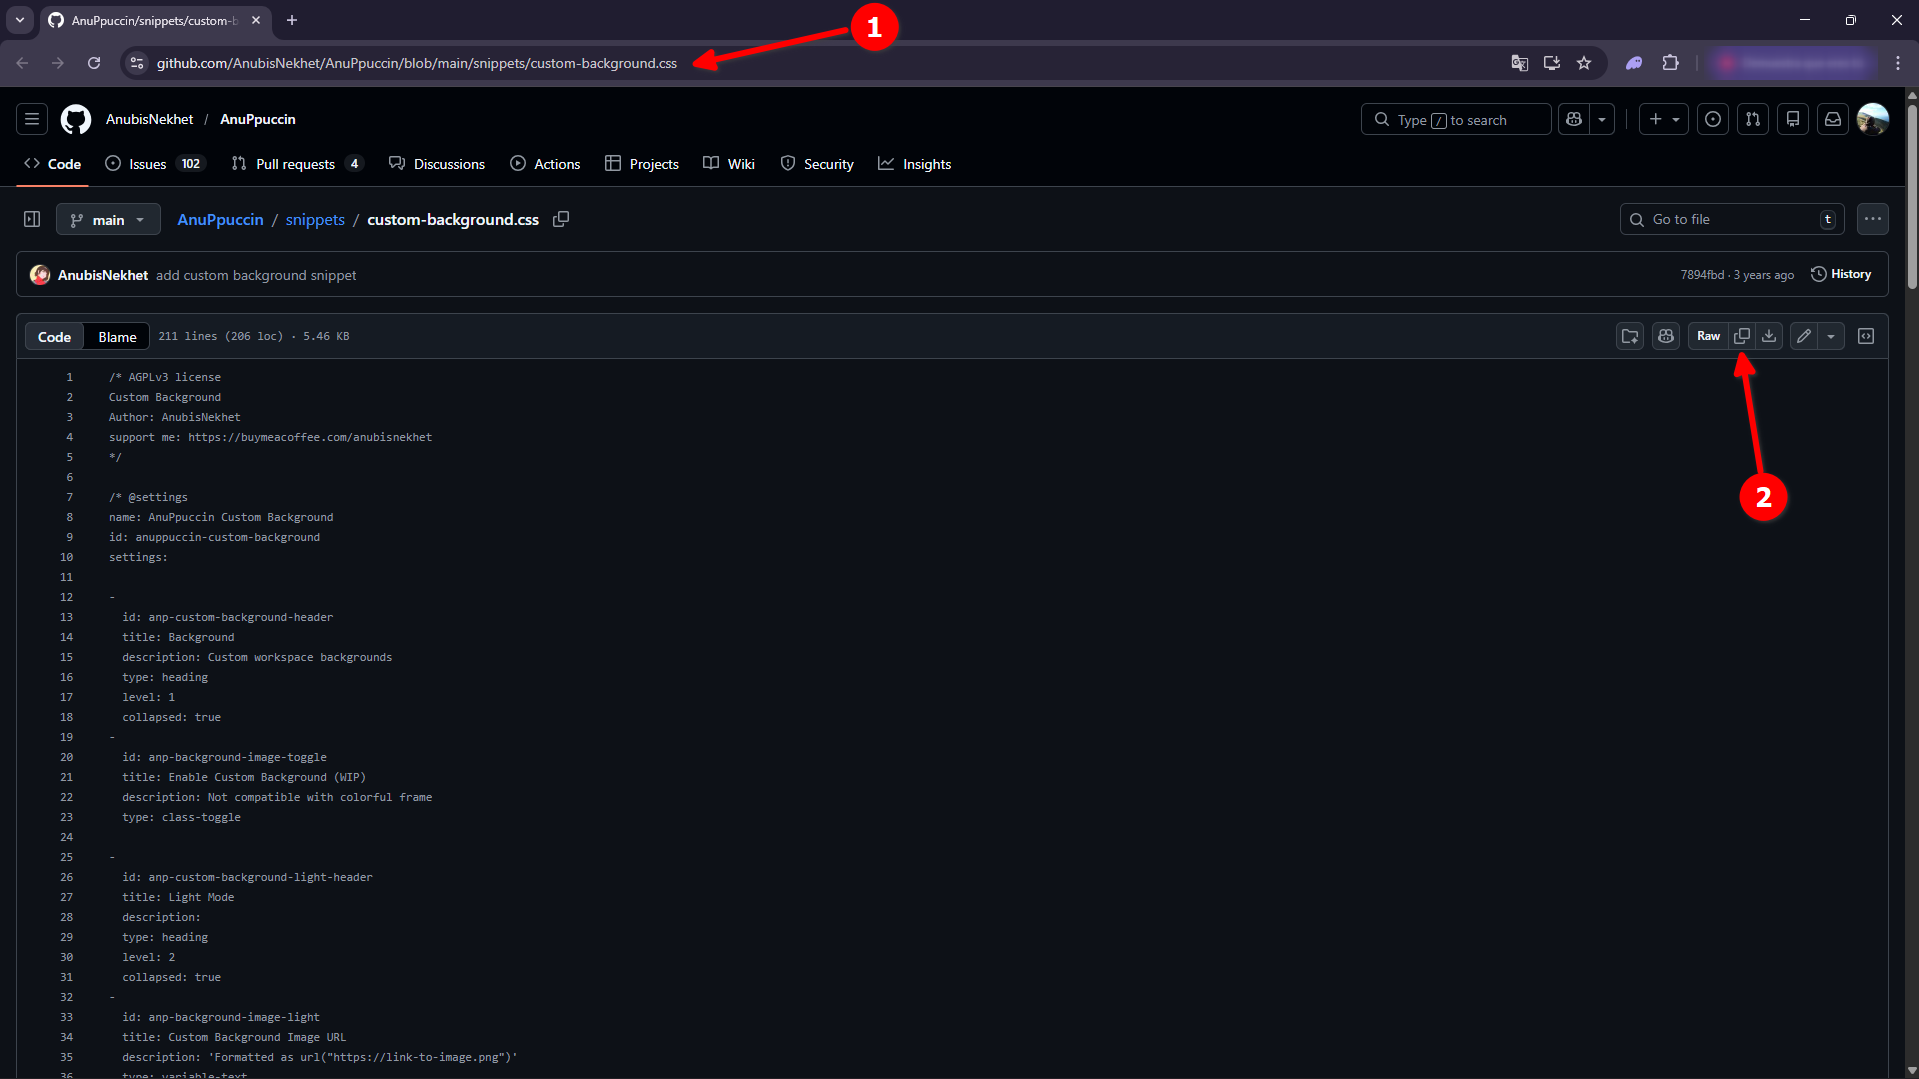
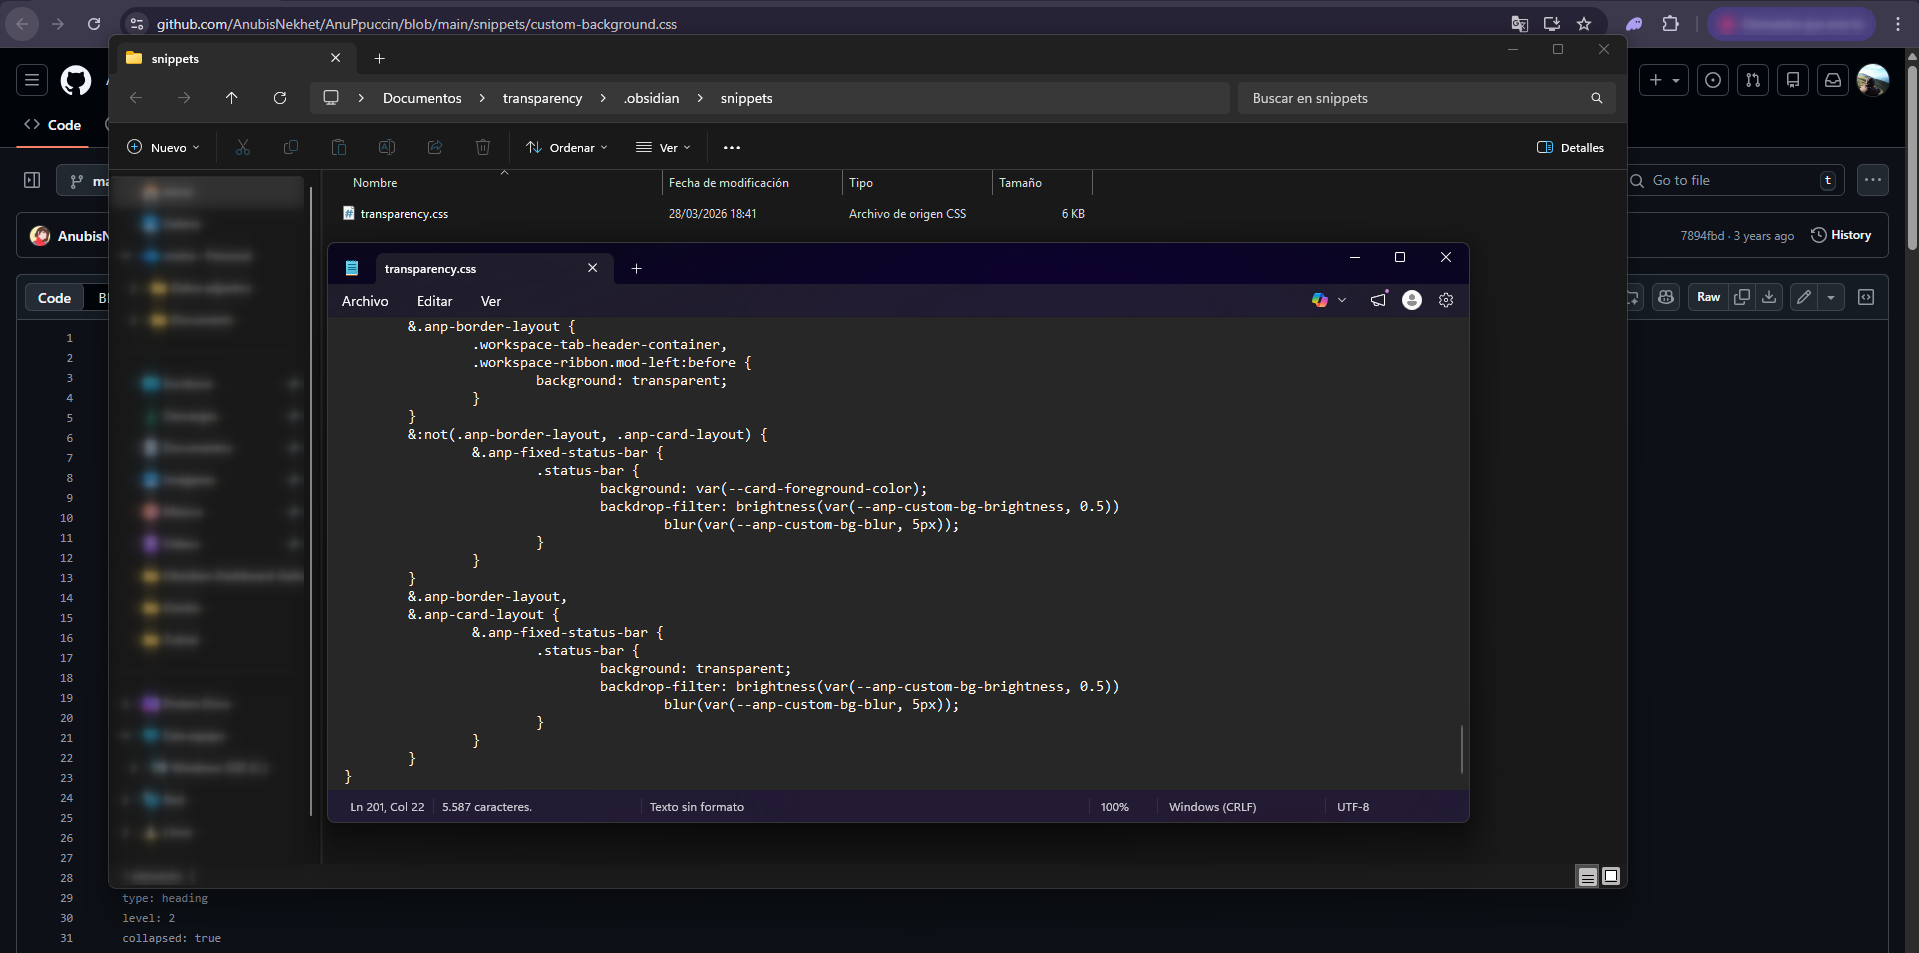
Now we need the CSS code that activates the background. To get it, open your browser and go to the AnuPpuccin repository.
You’ll see the file’s code displayed directly on GitHub. In the top right corner of the code block there’s a button to copy everything at once. Click that button to copy the entire content to your clipboard, as shown in the image.
Step 9 — Paste the code into the CSS file
Go back to the file explorer where you have the .css file you just created. Right-click on it and open it with any text editor you have available: it can be VS Code, Notepad, Notepad++, Gedit, or any other. Once open, paste the code you copied in the previous step (Ctrl+V), save the file (Ctrl+S) and close it. Your snippet is now ready.
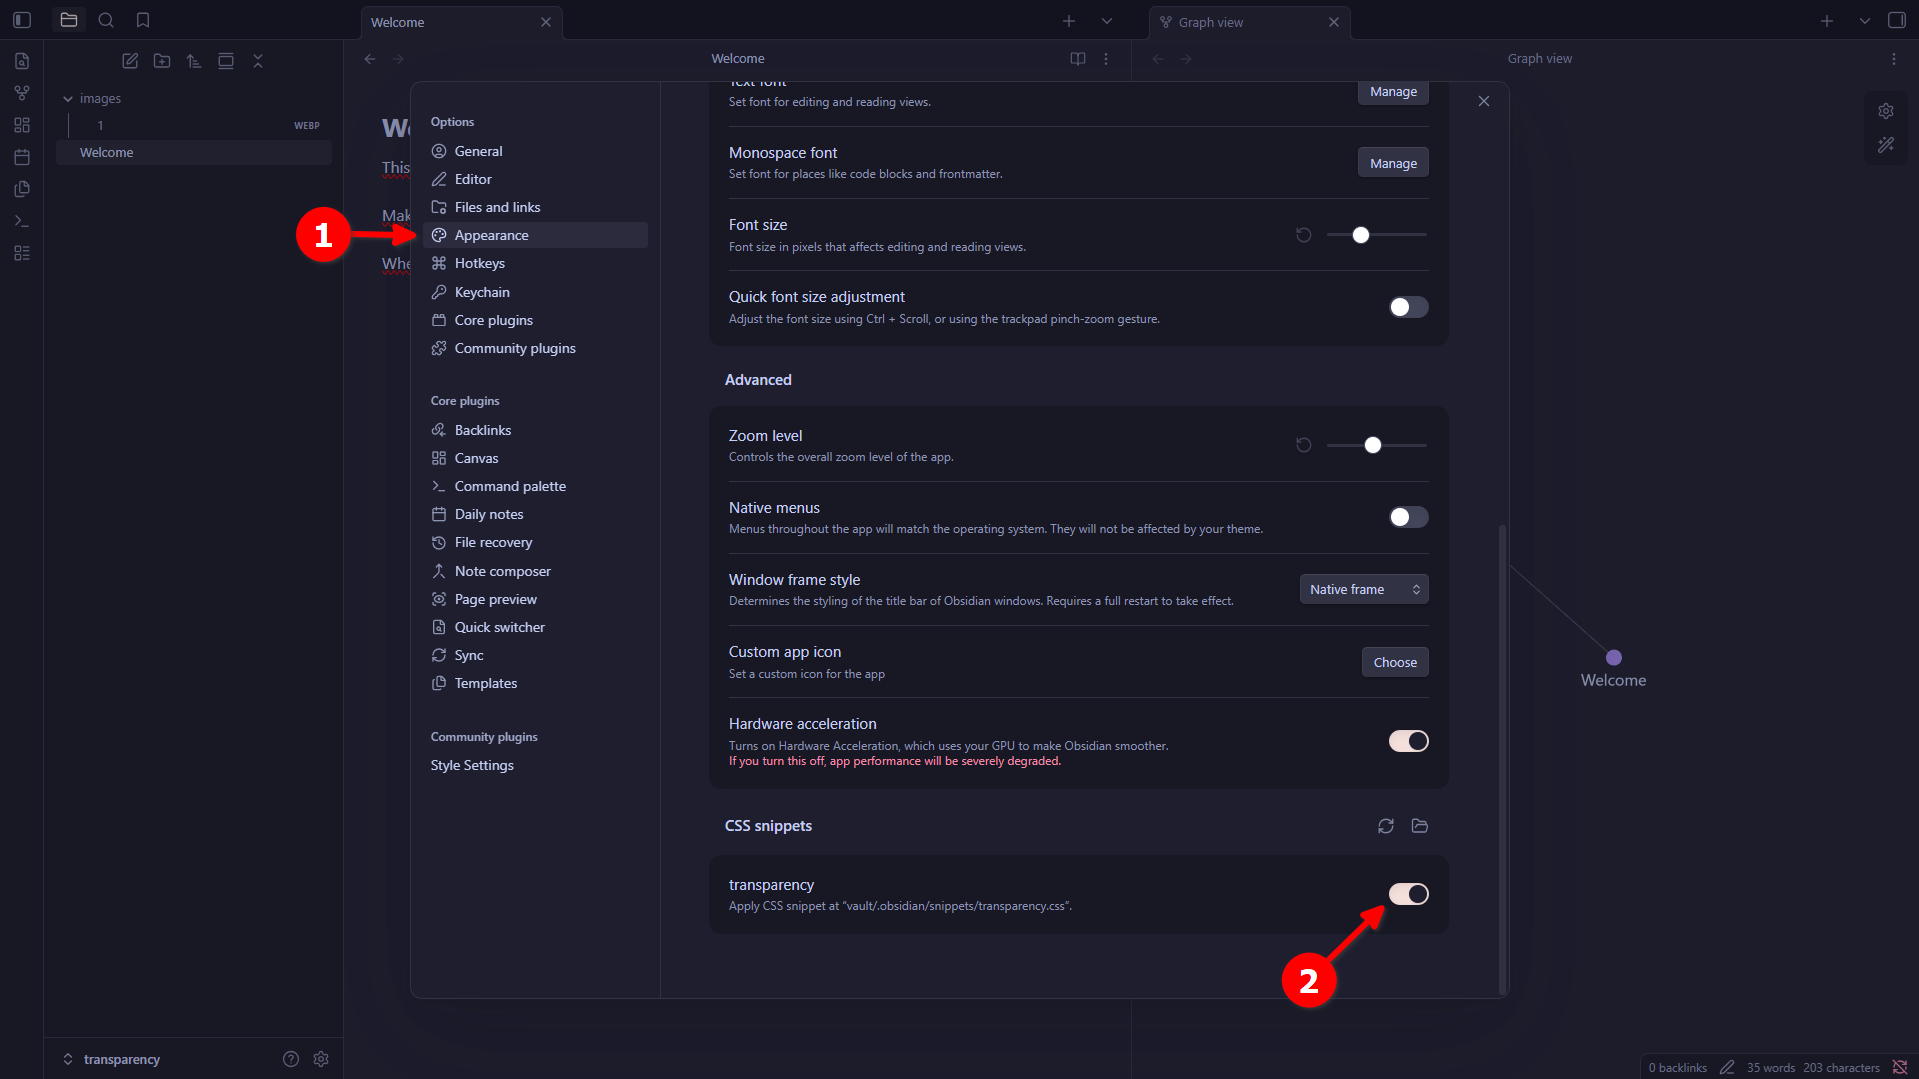
Step 10 — Enable the snippet in Obsidian
Go back to Obsidian and navigate to Settings → Appearance → CSS snippets. If the file you just created doesn’t appear in the list, click the refresh icon (the circular arrows) on the right. Once it appears in the list with the name you gave it, enable it by clicking the toggle switch to its right. If the toggle turns blue, the snippet is active.
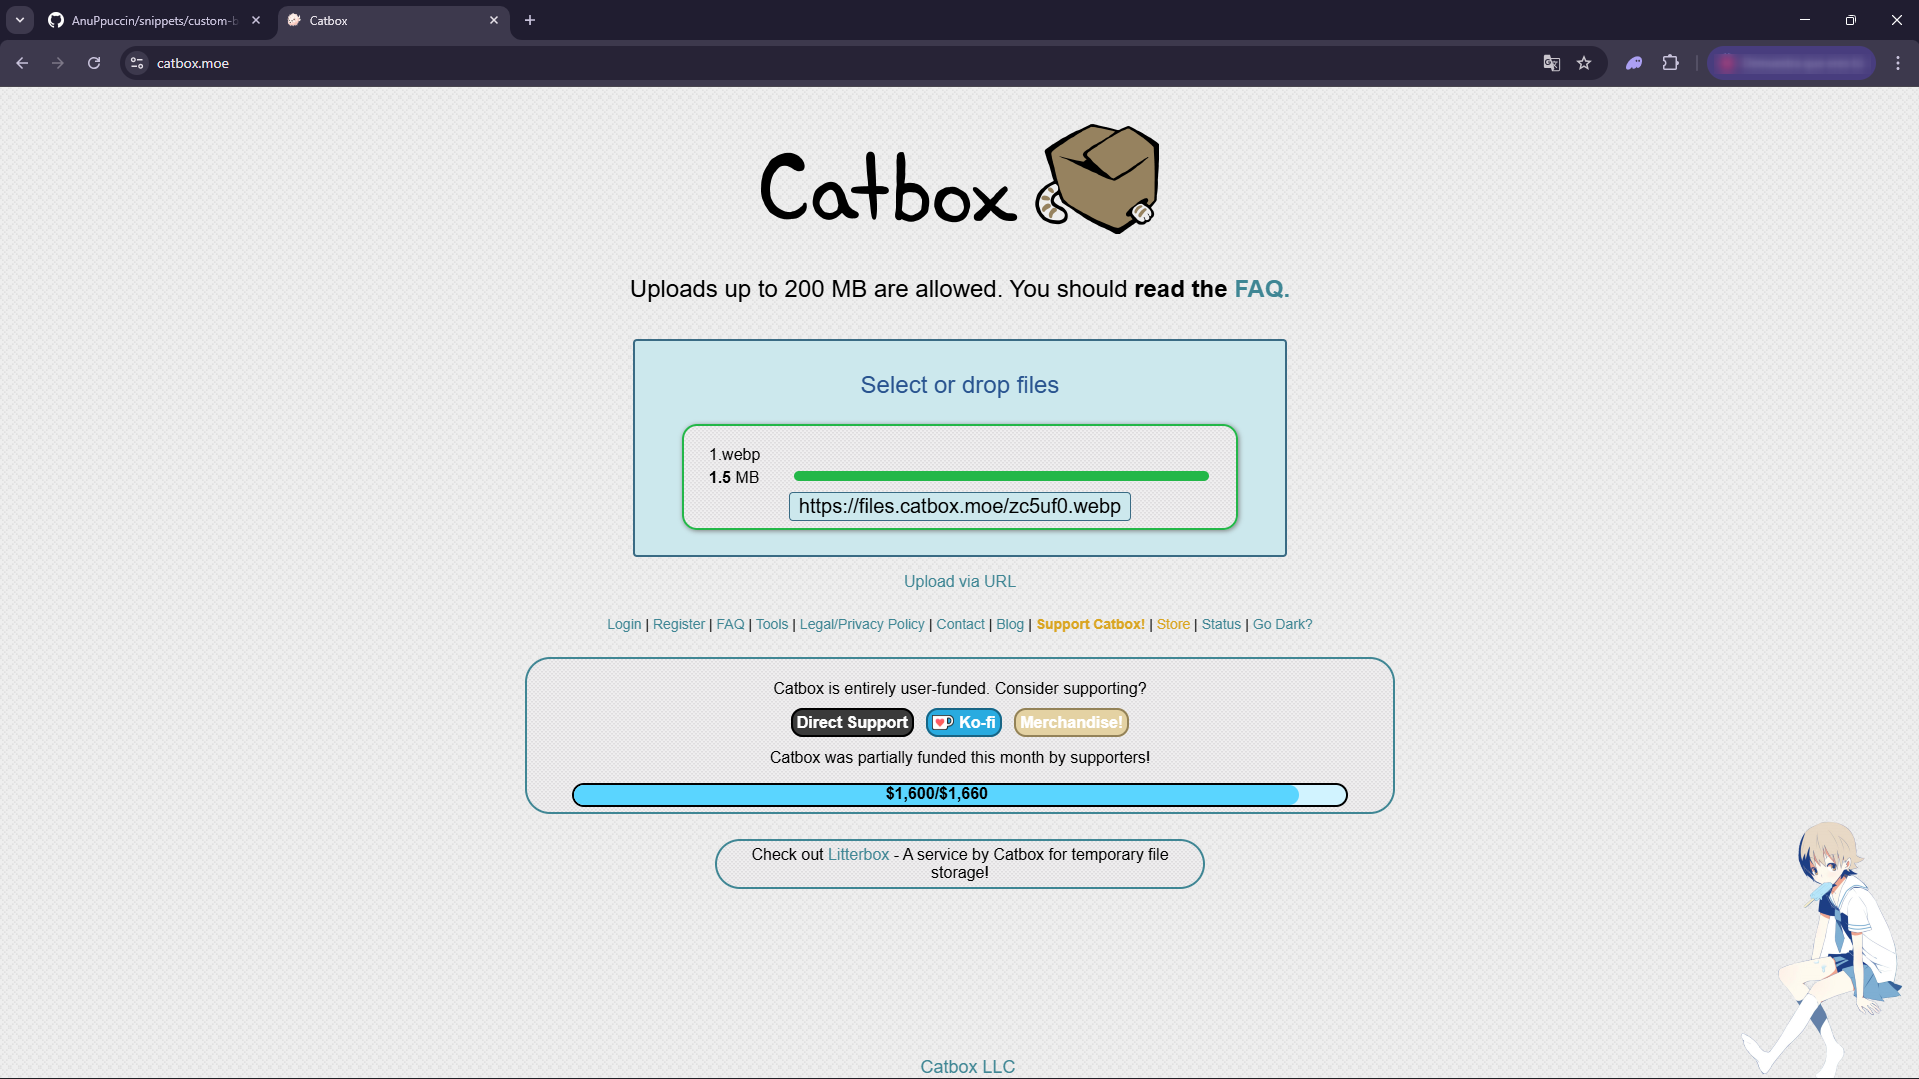
Step 11 — Upload your background image to a hosting service
For the background to work, we need a direct URL pointing to the image or GIF you want to use. Obsidian doesn’t allow using local files for this, so we need to upload the image to an online service that provides a direct access URL.
I use catbox.moe because it’s free, very straightforward, and doesn’t require registration. Just go to the website, click Select files, choose your image or GIF, and press Upload. Within seconds it will give you a direct URL ending in .png, .jpg or .gif. Copy that URL.
Important: Obsidian supports images (PNG, JPG, WEBP) and animated GIFs, but does not support videos. If you use a GIF, the background will be animated.
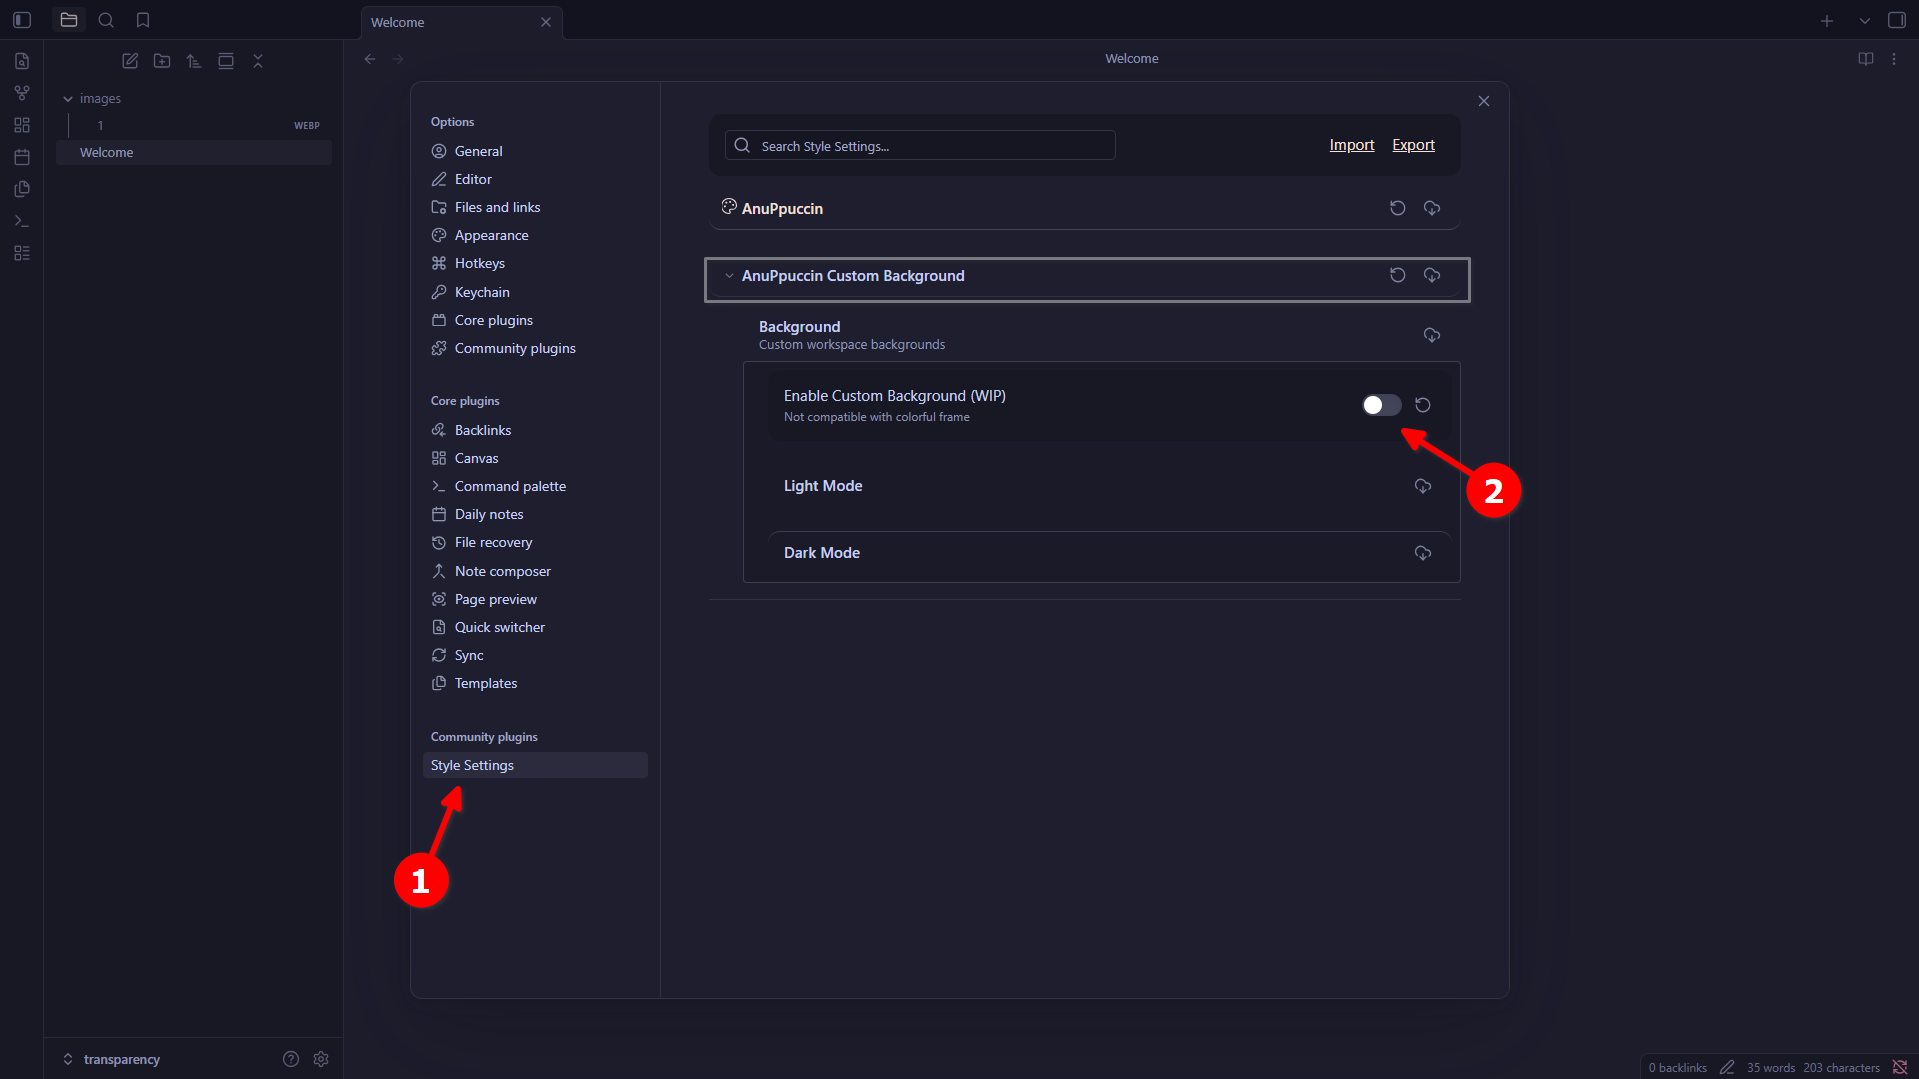
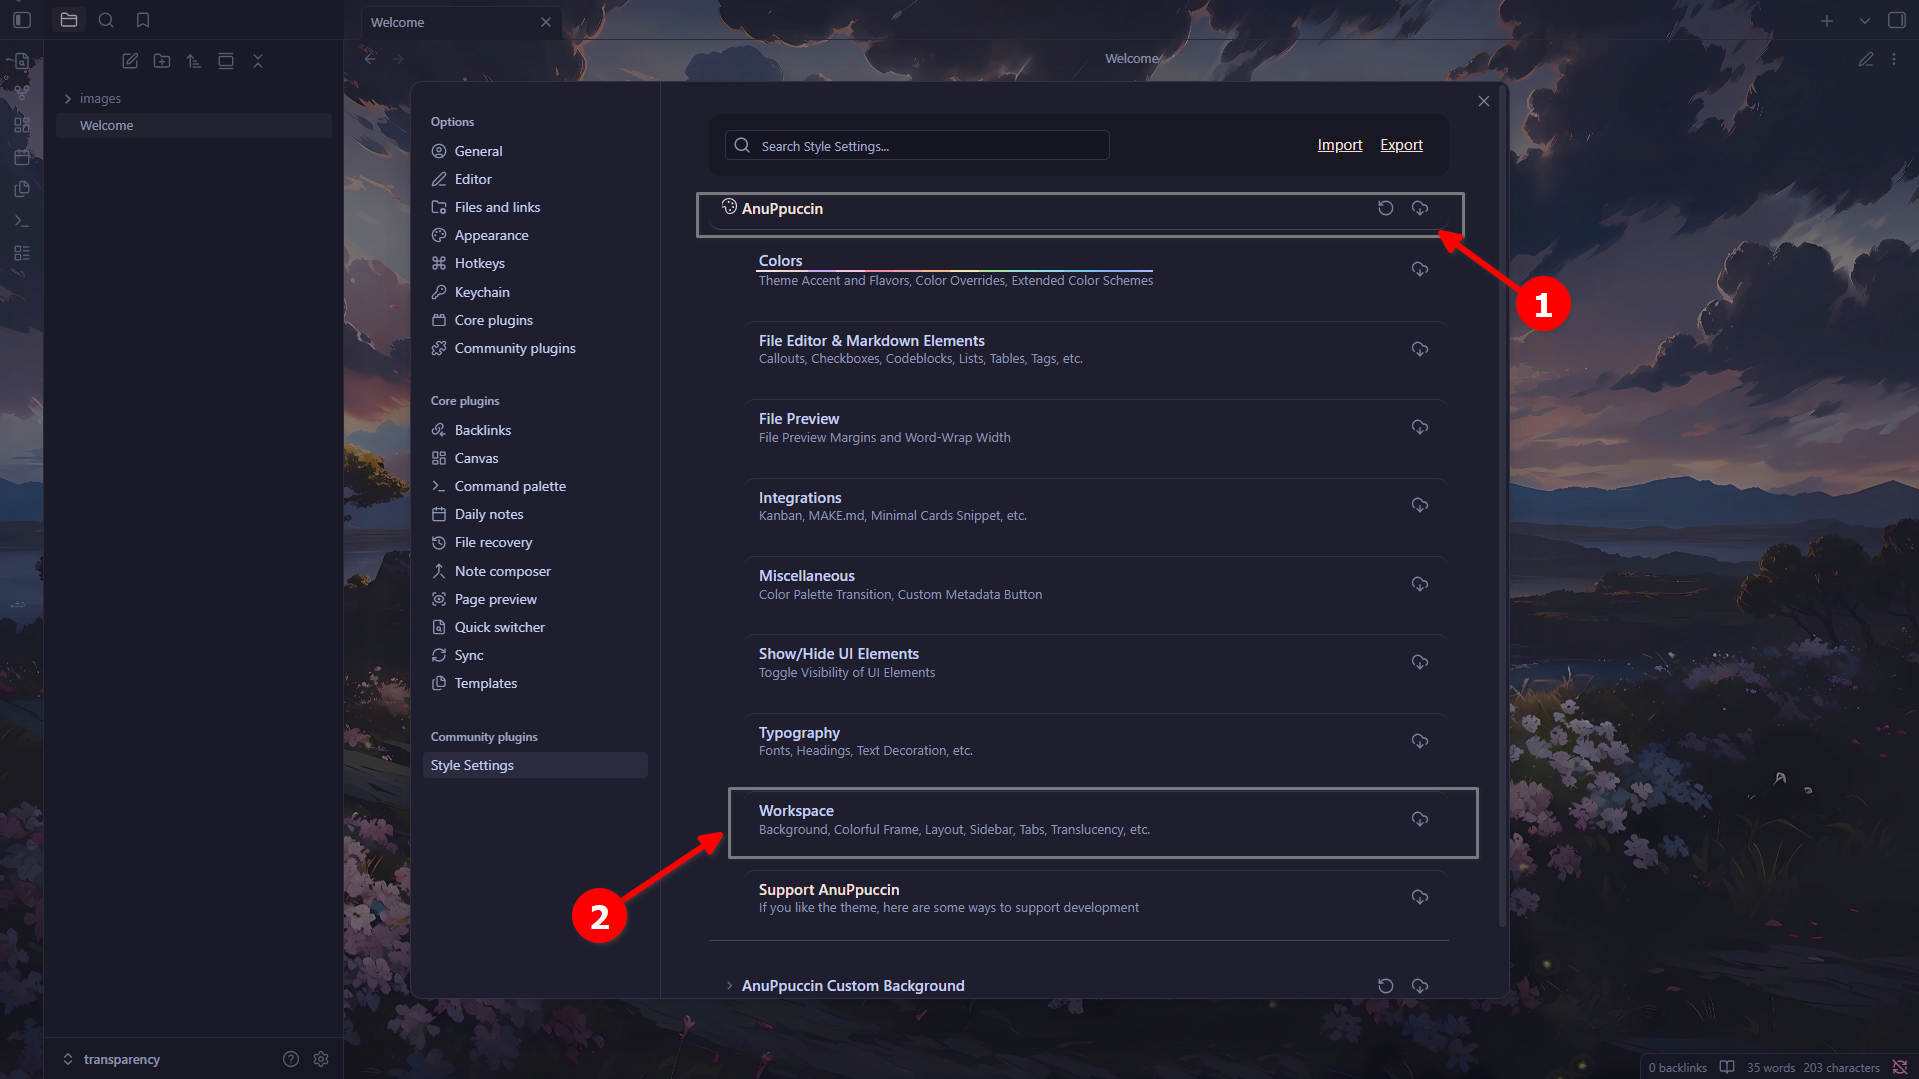
Step 12 — Open Style Settings and enable the custom background
Go back to Settings in Obsidian and scroll down the left sidebar until you find Style Settings (it will appear at the bottom, under the plugins section). Click on it to open it. You’ll see a list of expandable sections. Find and expand the option called AnuPpuccin Custom Background. Inside it, enable the toggle that appears to activate the custom background.
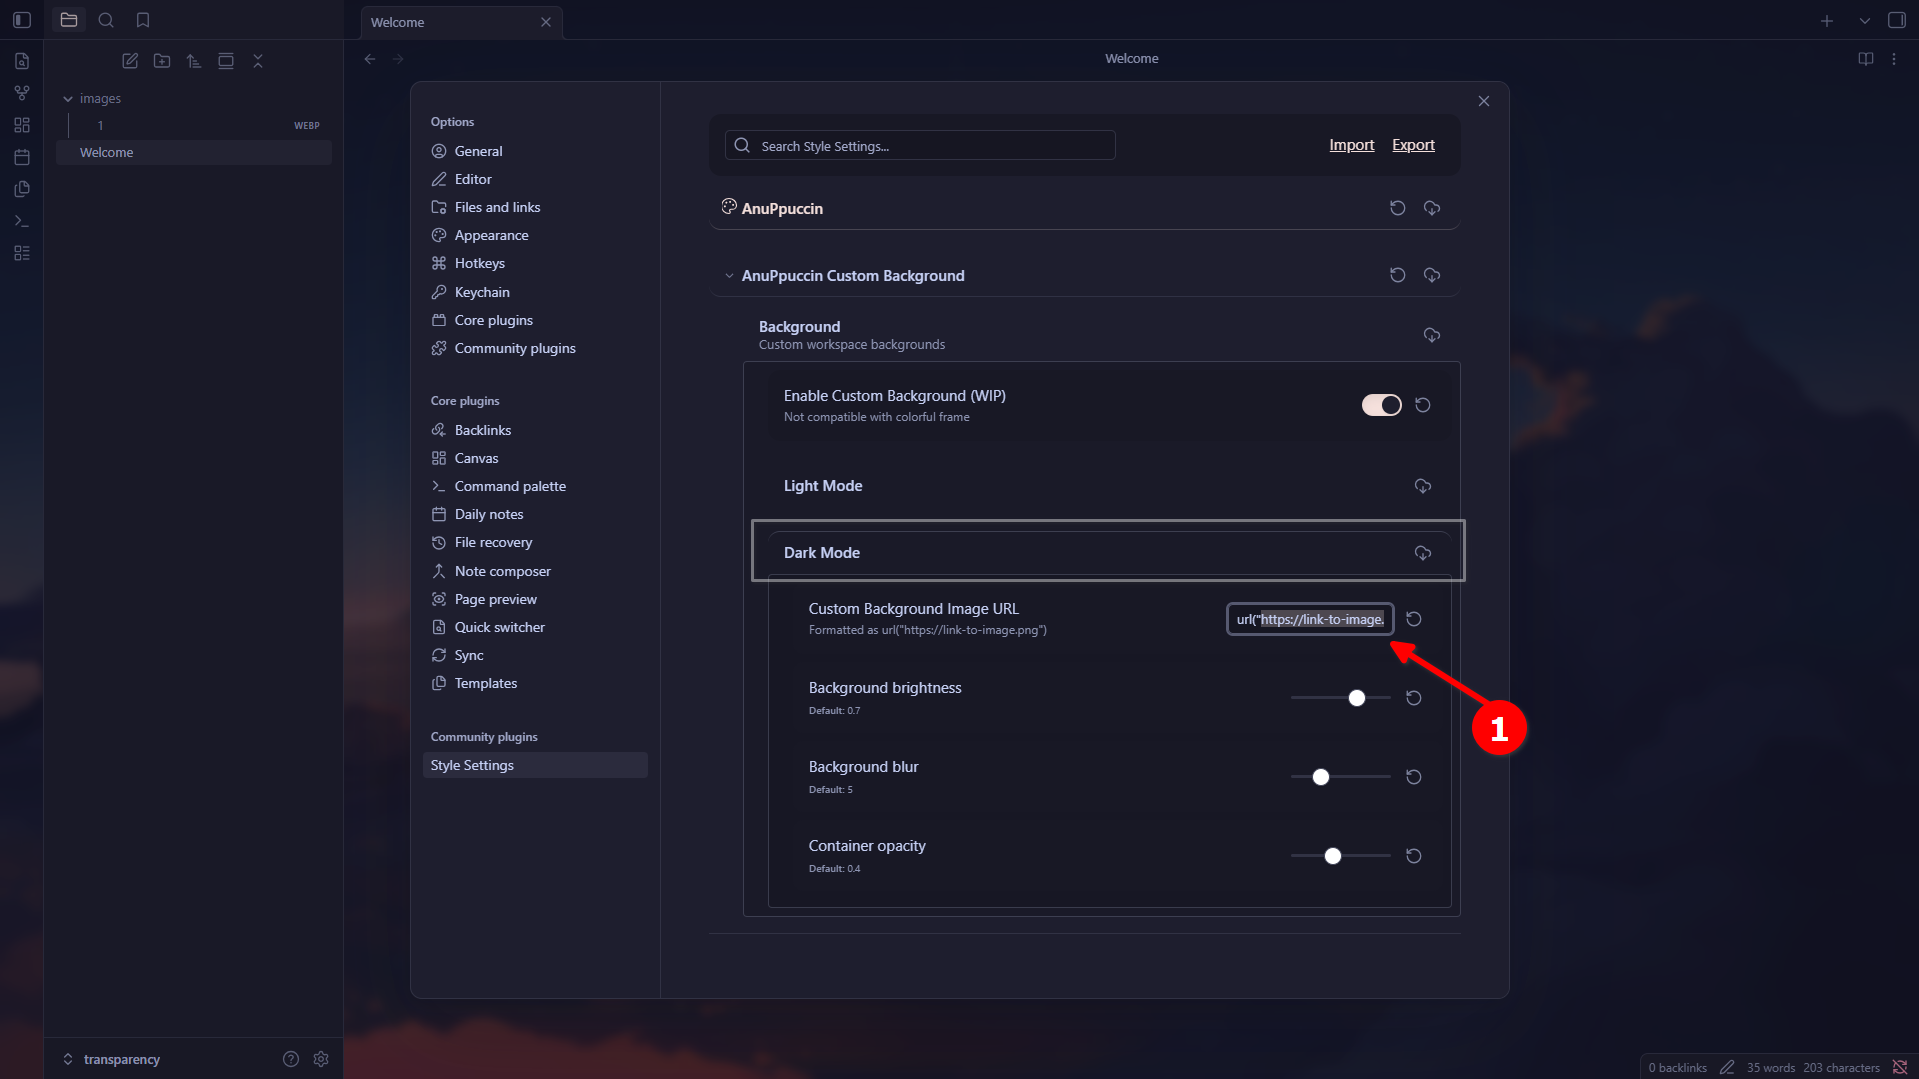
Step 13 — Configure the background according to your mode (dark or light)
Now you’ll need to configure the background based on the colour mode you use in Obsidian. Inside AnuPpuccin Custom Background you’ll see two expandable options:
- If you use dark mode → expand the Dark Mode Background section
- If you use light mode → expand the Light Mode Background section
The settings inside both options are exactly the same. If you’re not sure which mode you use, or if you switch between them frequently, I recommend doing the same configuration in both, so the background will always be visible regardless of the active theme.
Once inside the corresponding section, you’ll find a text field where you can paste your image URL. Paste it there as shown in the image.
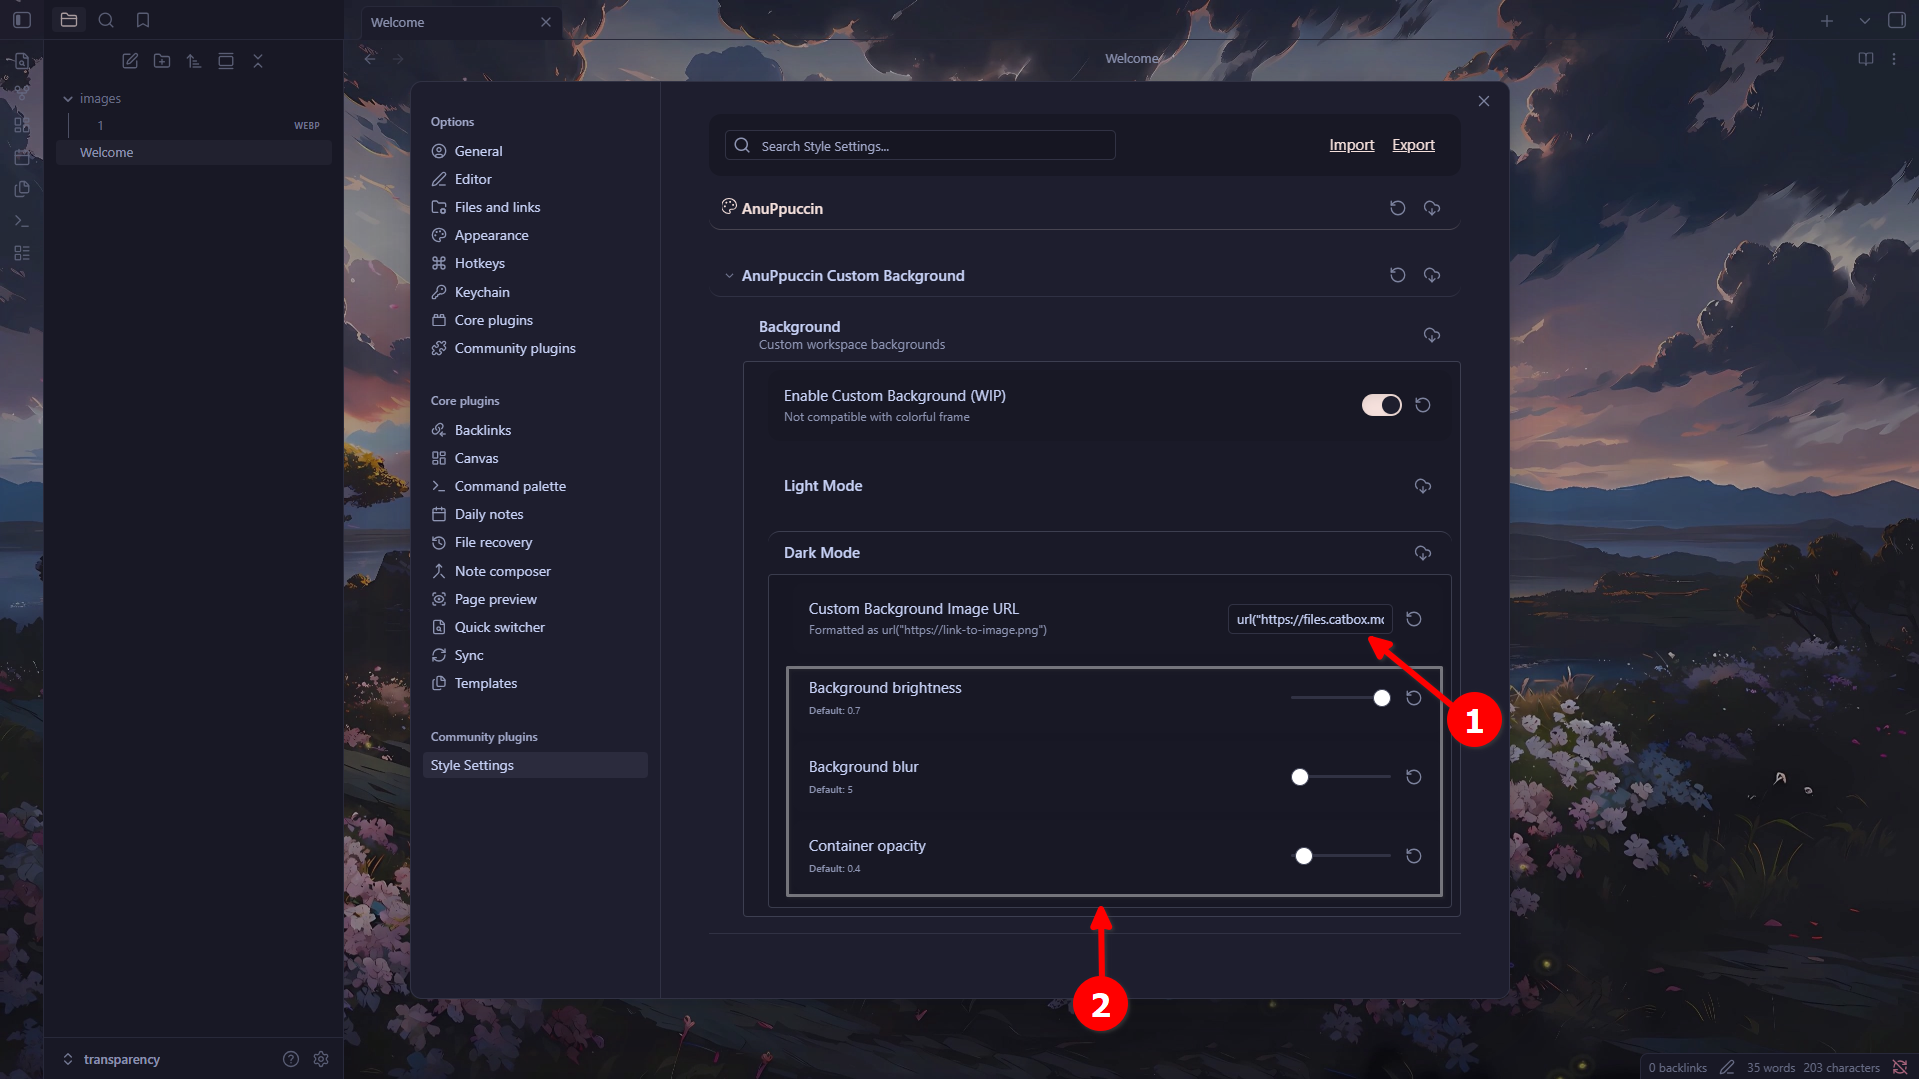
Step 14 — Adjust opacity, blur and other options
Once the URL is pasted, the background will already appear in Obsidian. Below the URL field you’ll see several sliders that you can adjust entirely to your liking:
- Background brightness: controls the brightness of the background. Adjust according to your preference, brighter or darker.
- Background blur: adds a blur effect over the image. This can look great with highly detailed backgrounds to keep them from being distracting.
- Container opacity: controls the opacity of the container. If you lower it, the background will look more transparent; if you raise it, it will be more solid.
There are no perfect values — simply move the sliders until the result looks good to you visually.
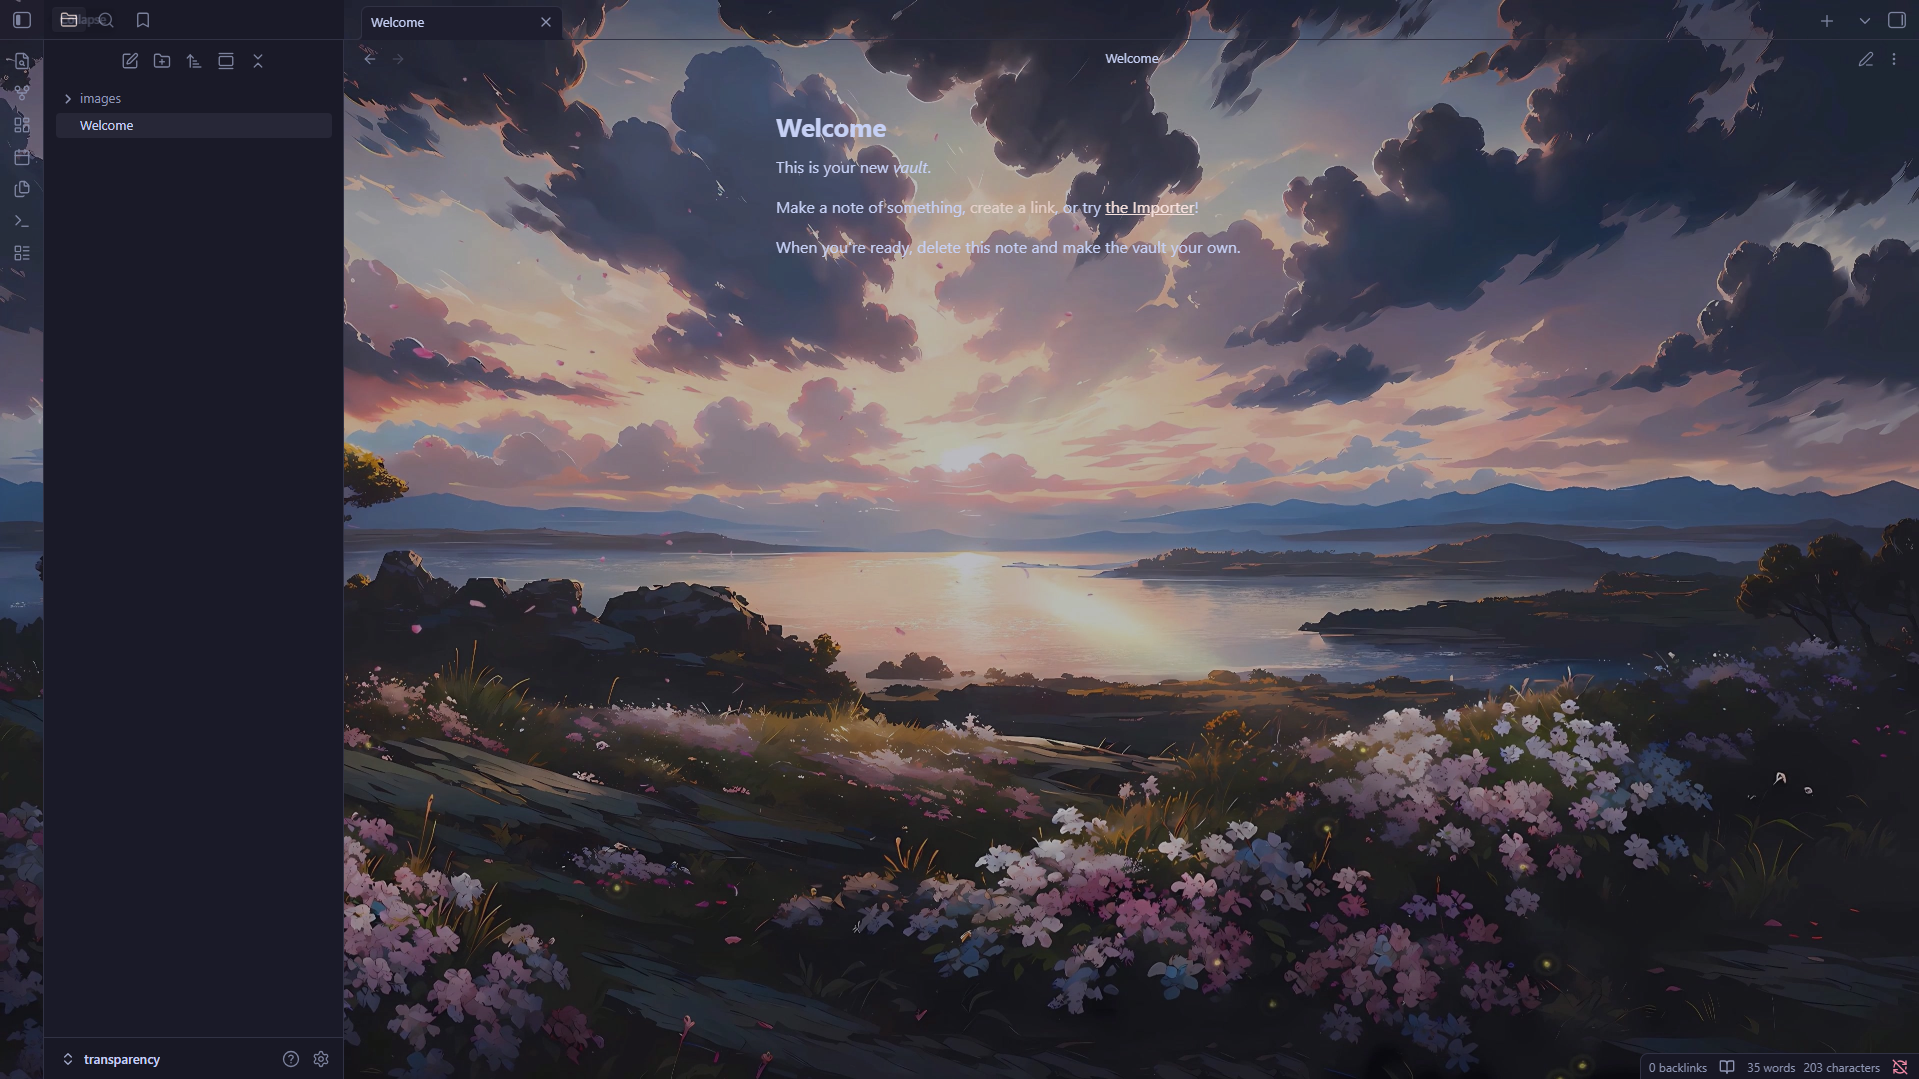
Step 15 — Result with the background applied
Your background is now applied! This is how Obsidian looks with the background image configured. As you can see in the image, the background appears in the central work area, but the side panels (the file navigation panel and the right sidebar) remain opaque and don’t blend in with the background.
If you want those panels to also be transparent to achieve the full effect shown in the opening screenshot, continue with the steps below.
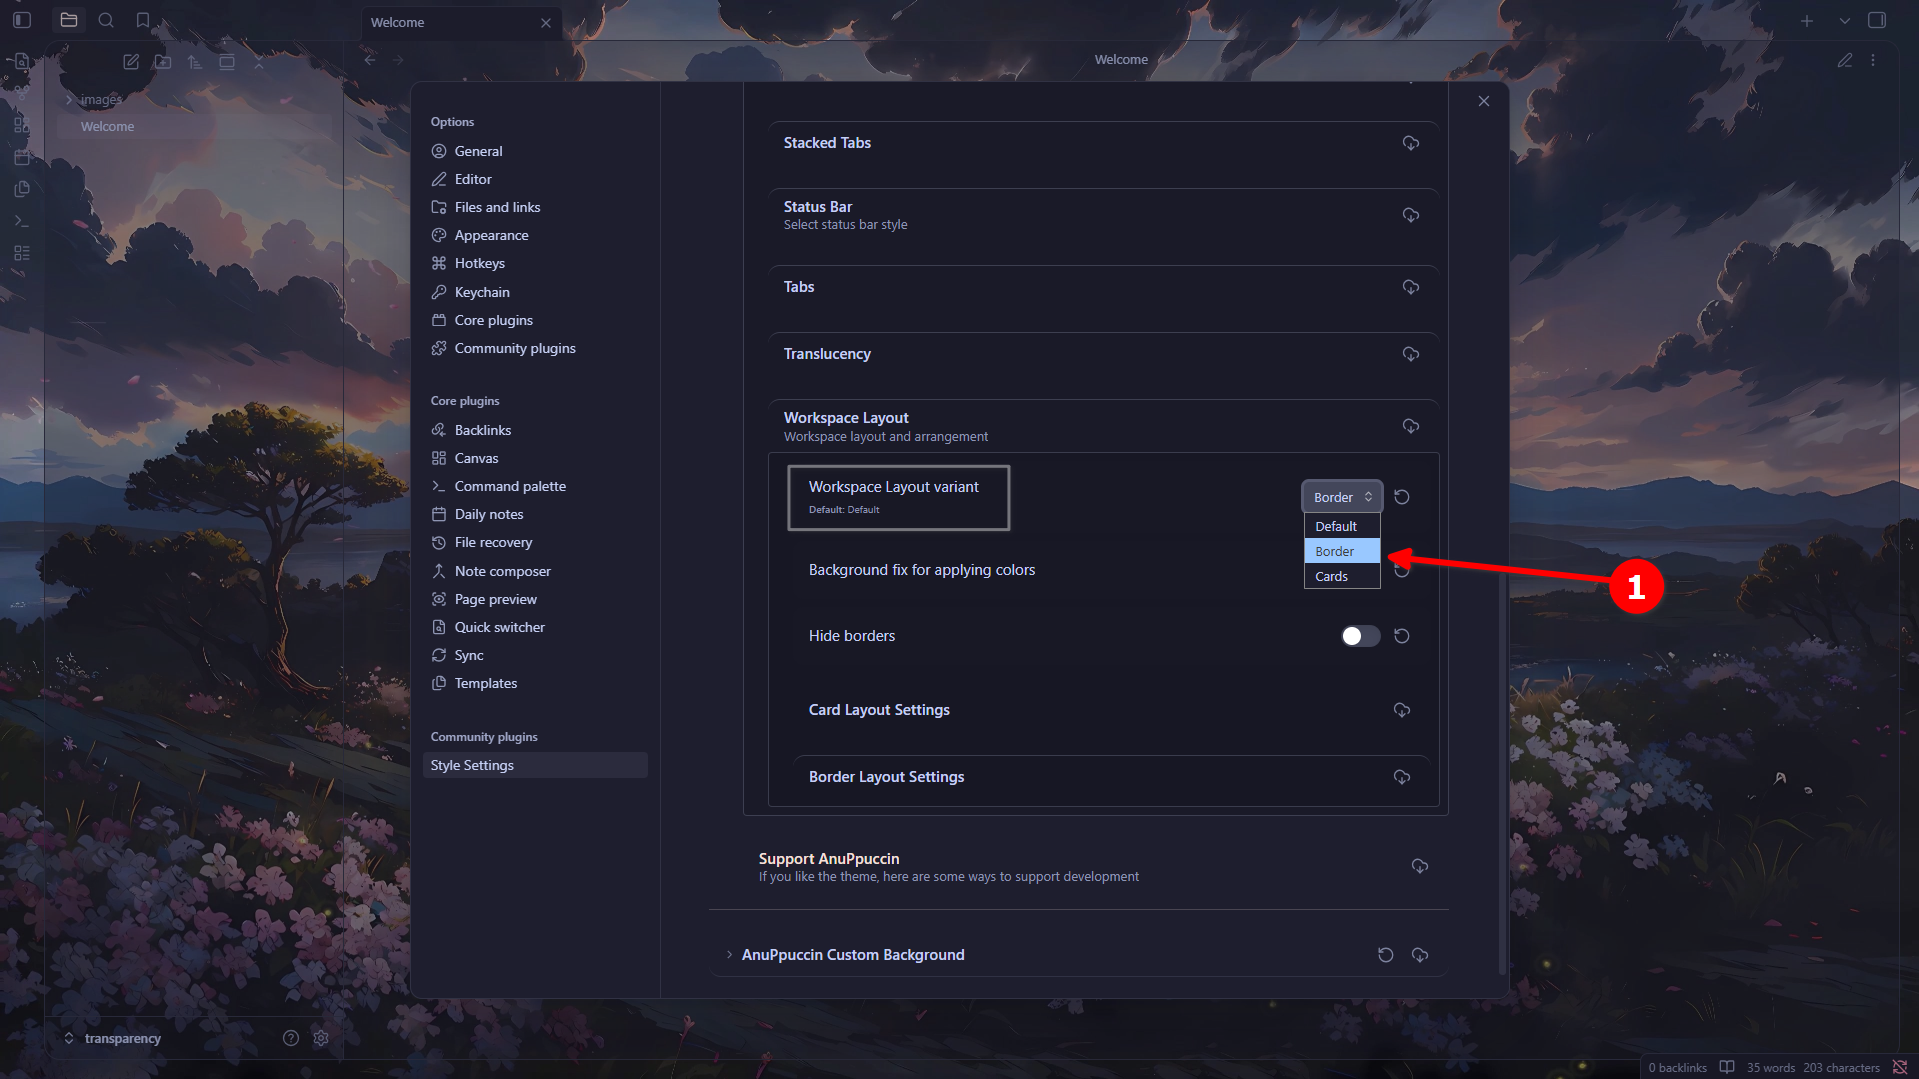
Step 16 — Go back to Style Settings → AnuPpuccin → Workspace
To make the side panels transparent, go back to Settings → Style Settings. This time, instead of expanding AnuPpuccin Custom Background, expand the main option called AnuPpuccin directly. Inside it, find and expand the sub-section called Workspace.
Step 17 — Expand Workspace Layout
Inside the Workspace section, scroll down a little and you’ll find a sub-section called Workspace Layout. Click on it to expand it.

Step 18 — Select the “Border” layout
In the first option of Workspace Layout (Workspace Layout variant) you’ll see a dropdown menu. Click on it and select the Border option. This layout is what makes the side panels adopt borders and transparency, blending in with the interface background.
You can also try the Cards option if you prefer that visual style, but I personally prefer Border because it looks cleaner and more minimalist. As always, it’s a matter of taste.
Final result
And this is how beautiful the final result looks! With the custom background and transparent side panels, Obsidian has a completely different and far more aesthetic appearance. I hope this tutorial has been clear, well-structured and simple enough for anyone to replicate without any trouble.
This tutorial only covers how to set up the background with transparency, but the Style Settings plugin together with the AnuPpuccin theme has many more customization options: you can change the typography for H1 and H2 headings, customize the look of tabs, the colours of callouts, and much more. If you’re interested in a tutorial on any of those options, let me know by opening an issue on GitHub and I’ll be happy to make one.